How Do I Repair a Damaged Portable Grill? The Ultimate Step-by-Step Field Guide for Outdoor Adventurers
By Mateo Salazar • 28th Oct
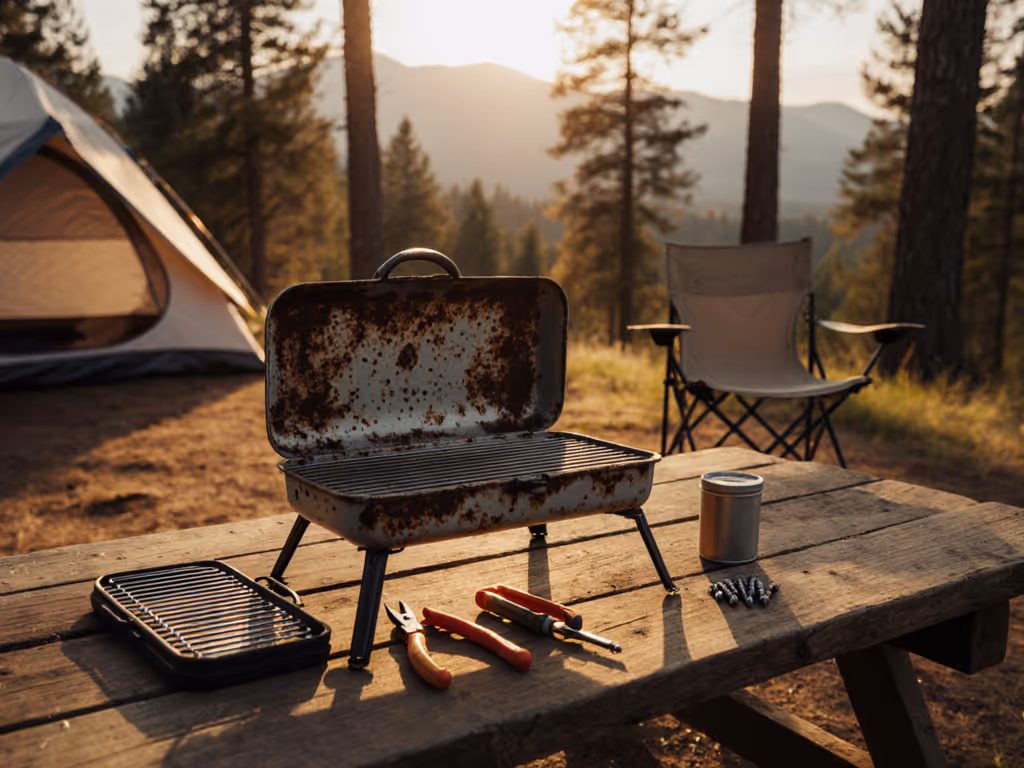
If you are asking yourself, how do i repair a damaged portable grill, you are likely hungry, short on daylight, and far from a hardware store. The good news is that most field failures have quick, safe fixes when you know where to look first. This Q and A [question and answer] guide brings together Searcase comparisons, curated insights, and on-trail checklists so you can diagnose issues fast, make confident repairs, and get back to cooking. Along the way, you will see when to repair, when to replace, and how to prevent your next breakdown.
How Do I Repair a Damaged Portable Grill? Quick Triage and Safety
Q: What should I check first when a grill is damaged?
Start with a 60-second triage that prioritizes fuel, flame path, and structure. First, confirm your fuel source is full and flowing by listening for a faint hiss at the regulator connection, then close the valve immediately. Next, inspect the ignition path: look for cracked electrodes, loose wires, and blocked burner ports that can starve the flame. Finally, scan the structure for bent legs, warped lids, or loose hinge pins that could shift weight unexpectedly. This order keeps you safe, narrows the fault quickly, and avoids replacing parts that are not actually the root cause. For a structured workflow, see our portable grill troubleshooting guide.
Q: Is it safe to attempt field repairs?
Yes, as long as you work methodically, avoid open flames near fuel, and test in small increments. Always disconnect fuel, let hot parts cool fully, and work on a flat surface away from dry brush or tents. Use soapy water to check for leaks at every reconnected joint; bubbles indicate a leak that must be fixed before relighting. Industry service logs suggest ignition and regulator faults make up roughly 30 to 40 percent of portable grill failures, which are usually solvable on-site with basic tools and spare seals.
Q: How do I decide what to fix first?
Use a risk-time-benefit lens. If a fault involves a gas leak, you must resolve that before anything else. If a fault is structural but stable, you can brace it and keep cooking, then reinforce it at home. To help you choose, use the triage table below as a quick decision map before you reach for tools.
| Symptom | Likely Cause | Field-Fixable? | Time Estimate | Risk Level |
|---|---|---|---|---|
| No ignition click/spark | Dead piezo, loose wire, wet electrode | Yes | 5-10 minutes | Low |
| Weak, yellow flame | Clogged burner ports or air shutter misaligned | Yes | 10-20 minutes | Medium |
| Flame-out in wind | Poor wind baffling or regulator freeze | Yes | 5-15 minutes | Medium |
| Fuel odor or bubbles at joints | Seal failure or cross-threaded fitting | Yes, if minor; else, stop | 10-20 minutes | High |
| Wobbly legs/wheel | Missing pin, bent bracket, stripped fastener | Yes | 10-30 minutes | Medium |
| Cracked enamel | Thermal shock or impact | Temporary seal only | 10 minutes | Low |
What Tools, Spares, and Materials Should I Carry for Trail-Side Repairs?
Q: What belongs in a compact grill repair kit?
Watch This Helpful Video
To help you better understand how do i repair a damaged portable grill, we've included this informative video from FIX Tech Guides. It provides valuable insights and visual demonstrations that complement the written content.
Our guides recommend carrying a palm-size pouch that weighs under 600 grams yet addresses 80 percent of common problems. Build yours around multi-use tools and consumables that tolerate heat and grease. Pack smarter with our essential portable grill tools checklist. Prioritize a stubby screwdriver with interchangeable bits, an adjustable wrench, long-nose pliers, and a foldable hex key set. Add high-temp gasket maker, a small tube of food-safe anti-seize, spare seals, and a leak-detection dropper bottle filled with water and a few drops of dish soap for reliable bubble tests.
Q: Which spare parts give me the best odds of success?
Packing a few brand-agnostic parts covers many grill families. Universal spark electrodes with mounting tabs, a piezo igniter button, two to three nitrile O-rings, and a short length of high-pressure fuel hose can bridge most ignition and gas-flow failures. Include stainless steel lock nuts, split washers, and cotter or hitch pins that fit leg hinges and wheel axles. Where possible, toss in a spare regulator if your grill uses a detachable unit, because regulators are a known single point of failure in cold and at altitude.
| Item | Purpose | Trail Substitutes | Notes |
|---|---|---|---|
| Adjustable wrench | Tighten hose and regulator fittings | Multitool pliers | Avoid over-torquing soft brass |
| Stainless wire | Temporary braces, grate repair | Coat hanger wire | Keep ends tucked to prevent snags |
| High-temp gasket maker | Seal small gaps, lid leaks | Aluminum foil wrap | Rated to 260 to 315 Celsius |
| Piezo igniter + electrode | Restore spark ignition | Use long-stem lighter | Dry parts before testing |
| Spare O-rings | Seal quick-connects | Fuel-safe tape as emergency shim | Match inner diameter and thickness |
| Stainless hardware kit | Replace stripped fasteners | Retie with wire | Lock washers resist vibration |
Carry a laminated note with torque reminders and safety steps so you do not skip checks under pressure. Aggregated reports and retailer data show ignition hardware, burner contamination, and leg fasteners as the top three culprits on longer trips. A little foresight, plus parts that fit multiple grills, will keep your pack light while dramatically improving your repair odds.
Q and A: How Do I Fix Burners, Igniters, Gas Lines, and Regulators?
Q: Why is my flame weak, uneven, or yellow instead of blue?
Weak or lazy yellow flames usually trace back to airflow or port blockage. Remove the grate and heat shield, then pull the burner tube if your design allows, and tap loose debris while brushing ports with a brass brush. Check the air shutter at the burner throat; it may have shifted, restricting oxygen. Set shutters so the test flame is mostly blue with small yellow tips, and verify the venturi is free of spider webs, which often build in stored grills. If performance improves with the lid open but not closed, confirm exhaust vents are clear and the heat diffuser has not warped into the flame path.
Q: The igniter stopped clicking. How do I restore spark?
First, dry the ignition system. Moisture short-circuits spark paths and ruins trail dinners. Disconnect fuel, pull the electrode lead, and dry the electrode tip and the wire with a clean cloth. If there is still no click, check the piezo button for looseness and confirm the electrode gap is 3 to 5 millimeters from the burner surface. Replace the electrode if cracked, and reroute the lead away from sharp edges using two stainless steel zip ties. If all else fails, install your spare piezo and electrode, or use a long-stem lighter while keeping your face and hands clear of the burner.
Q: How do I deal with gas leaks, kinks, and regulator issues?
After any impact or cold-soak, inspect the hose and regulator. With fuel barely open, brush soapy water over every joint; bubbles indicate a leak. Tighten fittings finger-snug, then one quarter-turn with a wrench, and retest. Replace any crushed O-ring immediately. Regulators can stick after sudden temperature drops, causing low flow. Warm the regulator gently with your hands and close-reopen the valve slowly to prevent the internal diaphragm from slamming shut. Some canister stoves and small grills use butane that vaporizes poorly below 0 Celsius, while propane maintains pressure; choosing propane improves performance. If a regulator hisses from its vent hole, retire it from service and use your spare to avoid risk. Before you relight, review our portable grill safety guide.
| Issue | Test | Field Fix | When to Replace |
|---|---|---|---|
| Leak at hose fitting | Soapy water bubble test | Retighten, new O-ring, thread sealant rated for gas | Cracked flare, stripped threads |
| Regulator low flow | Flame stays weak at max | Warm regulator, reopen valves slowly | Hissing at vent, persistent low flow |
| Clogged burner | Uneven flame pattern | Brush ports, clear venturi | Large cracks or rusted-through tube |
| Dead igniter | No click, no visible spark | Replace piezo and electrode | Repeated failures due to water ingress |
Remember that gas pressure is measured in PSI [pounds per square inch], heat output is often listed in BTU [British Thermal Unit], and many portable grills run on LPG [liquefied petroleum gas]. Those terms appear on tags and manuals, and understanding them improves troubleshooting. If manufacturer parts are unavailable on the trail, universal components can bridge you through the trip, but always perform a leak test before relighting. Searcase repair guides include step-by-step photos you can cache offline, plus model-specific tolerances for shaker grates, electrode gaps, and safe air shutter ranges.
Q and A: How Do I Repair Frames, Lids, Grates, Wheels, and Hinges?
Q: My lid is bent and the grill leaks heat. Can I straighten it?

Yes, light bends can be coaxed back with patience. Remove the lid, cushion the high spot with a folded towel, and press gently to re-square the rim against a flat surface. For stubborn twists, use two adjustable wrenches on opposite edges to micro-adjust a few millimeters at a time. Finish by running a bead of high-temp gasket maker along the inner rim to seal gaps; it cures in minutes and improves heat retention. If porcelain-enamel chips are present, clean the area and dab with high-temp paint to reduce rust until you can refinish at home.
Q: The legs wobble and a wheel keeps popping off. What now?
Field-stabilize first, then reinforce. Inspect for missing cotter or hitch pins on wheel axles and hinge points; replace with spares or secure temporarily with stainless steel wire wrapped through the hole. Tighten loose fasteners with lock washers to resist vibration. If a bracket is bent, straighten it with pliers and brace the joint by doubling washers to spread load. Test stability before lighting. Comparative guides examine how leg geometry holds up across rocky campsites and tailgate asphalt, and we recommend grills that keep a wide, triangulated stance to resist wobble in wind.
Q: My grate cracked mid-cook. Can I keep going safely?
You can, with caution. Shift food to intact sections and bridge the crack using stainless wire or a clean, food-safe steel tent stake laid across bars as a temporary support. Avoid aluminum supports inside direct flame zones; they soften at grill temperatures. After the meal, file sharp edges and measure the grate to source a replacement that fits your model. If your grate is cast iron, re-season it after repair to resist rust: warm the metal, wipe on a thin oil layer, and heat until it stops smoking.
- Pro tip: Keep a packable silicone mat for resting hot parts when you need both hands on a repair.
- Pro tip: Mark leg pivot holes with a paint pen so you can detect widening before it becomes wobble.
Q and A: Why Do Altitude, Wind, and Fuel Type Wreck My Cook, and How Do I Adapt?
Q: Why does my grill struggle at altitude or in cold wind?
Thinner air at elevation reduces available oxygen, and cold wind strips heat from the cook box. Regulators also deliver less pressure when canisters are cold, especially if you are burning butane. Comparative analyses and reported experiences show many portable grills lose 10 to 25 percent effective heat at 2,000 meters, with wind gusts causing flame-outs if the burner is not shielded. To adapt, pre-warm the fuel, widen the air shutter slightly for more oxygen, raise the windward leg to tilt the lid as a baffle, and cook with the lid closed whenever safe to do so. For elevation-specific adjustments, follow our high-altitude grilling techniques.
Q: Which fuels behave best for portable grills in real-world conditions?
Fuel choice shapes reliability and flavor. Propane maintains pressure in cold, while butane can stall near freezing. Charcoal is resilient to wind once lit and delivers deep sear flavors, but it adds setup time and ash cleanup. Pellet grills offer steady temperature control but draw power and can struggle in strong crosswinds. Use the Searcase cheat sheet below to match your trip conditions with the right fuel and backup plan, and remember that local fire rules may restrict solid fuels during dry seasons.
| Fuel | Cold Performance | Wind Resilience | Flavor Profile | Notes |
|---|---|---|---|---|
| Propane | Strong down to -40 Celsius | Moderate with lid closed | Clean, neutral | Best for fast setup and reliable pressure |
| Butane | Poor below 0 Celsius | Moderate | Clean | Keep canister warm in a pocket |
| Charcoal | Good once lit | Good with wind baffles | Smoky, robust | Requires ash management and local compliance |
| Pellet | Good with dry pellets | Fair, fan-driven | Wood-smoke nuanced | Needs power and weather protection |
Q: How can I prevent wind from stealing my heat?
Create a controlled microclimate. Position the grill behind a natural windbreak, angle vents leeward, and use a foldable wind screen that stops short of enclosing the regulator and hose. Never drape fabric near hot surfaces or block the regulator vent. Comparative analyses and reported experiences show that adding a 20-centimeter-tall metal baffle around three sides can cut fuel consumption compared with an open setup in steady 20-kilometer-per-hour winds. Small changes like these keep flame stable and shorten cook times.
Q and A: Cleanup, Compliance, and Preventing the Next Failure
Q: What is the fastest way to clean up and leave no trace?
Plan for a simple, compliant routine. Line your grease tray with foil before you start, then pinch and pack the foil after cooking to contain drips. Brush grates while still warm with a chain-mail scrubber and a splash of water, avoiding bristle brushes that can shed. Capture charcoal ash in a metal container with a lid until fully cold, then dispose according to local rules. For a deeper routine at home and on the road, use our portable grill cleaning guide. Searcase guides include jurisdiction-specific reminders so you can meet bans on hot ash and transport caps on fuel canisters without guesswork.
Q: How do I keep my grill from getting damaged again?
Preventive care is easier than field repair. Store your grill dry, with vents slightly open to shed condensation. Slip foam pipe insulation over grates and lid edges to prevent dings in transit. Before each trip, run a 90-second function check: spark, valve turn, regulator hiss, and brief test flame. Replace any hardware that is more rust than metal, and keep a small card of part numbers for fast reorders. According to aggregated retailer returns, grills that get a pre-trip check are half as likely to suffer trip-ending faults.
Q: When is repair not worth it?
Retire a grill if the firebox is rust-perforated, the regulator vents fuel, or the burner tube is split. If the frame flexes badly under load, or if the cost of a burner and regulator exceeds half the price of a new, higher-rated model, upgrading is sensible. Searcase rankings consider packability, setup speed, stability, and heat consistency; we highlight models with robust legs, accessible burners, and widely available spare parts. That way, your next grill starts durable by design and stays field-serviceable for years.
Where Does Searcase Fit In, and How Do Their Guides Help You Win Trips?
Q: What makes Searcase a reliable authority for portable grill fixes?
Searcase is built around real-world comparisons and aggregated reports, not lab-only claims. Our guides synthesize manufacturer specifications, user feedback, and side-by-side comparison data to evaluate ignition reliability, flare-up control, and flavor under wind and altitude. We log time-to-heat, fuel consumption, and stabilizer effectiveness where available so you can trust the guidance you are reading. Our repair library collects step-by-step tutorials, model comparisons, and troubleshooting trees, plus we score grills for packability and setup speed so you carry less and cook sooner.
Q: How do Searcase comparisons and guides solve common travel challenges?
Travel often means changing rules, weather, and fuel availability. Searcase fuel comparisons pit pellet against charcoal, propane against butane, and tie results to flavor and performance in the field. Our wind control strategies and altitude techniques show how to tweak air shutters, shield burners, and select fuels that perform in the cold. We also publish quick-cleanup checklists that meet campground and public land rules, reducing fines and friction without slowing your getaway. In short, we help you choose better gear and keep it running smoothly when conditions change.
Q: Can you give a quick, step-by-step repair example from a common scenario?
On a three-night ridge trip, a camper encountered a no-spark igniter and a wobbly leg. Step 1: isolate fuel and cool the grill. Step 2: reseat the electrode, dry it, and set the 4-millimeter gap. Step 3: replace a missing hinge pin with a spare cotter pin and add a lock washer to the loose leg bolt. Step 4: confirm no leaks with a bubble test. Total time: 12 minutes. Dinner started on time, and the fixes held across the remaining hikes and one blustery sunset cook.
Step-by-Step Mini Repairs You Can Do Right Now
Q: How do I clear a clogged burner in under 15 minutes?
- Disconnect fuel and cool the grill completely.
- Remove grate and heat shield; lift off burner if possible.
- Tap and brush ports with a brass brush; avoid enlarging holes.
- Inspect venturi for debris; clear with a pipe cleaner.
- Re-seat burner, align the air shutter, and test on low flame.
- Adjust shutter until flame is mostly blue with small yellow tips.
Q: How do I stop a minor leak at a quick-connect?
- Close the valve and depressurize the line.
- Inspect and replace the O-ring if nicked or flattened.
- Finger-tighten the collar, then add one quarter-turn with a wrench.
- Brush on soapy water; reopen the valve slowly and watch for bubbles.
- If bubbles persist, stop and replace the connector at home.
Q: How do I stabilize a shaky grill on uneven ground?
- Rotate the grill to face vents leeward.
- Shorten the windward leg by one washer or shim with a flat rock.
- Guy-line the frame to a stake or heavy cooler using paracord.
- Verify zero wobble before lighting.
Every fix above is part of Searcase’s repair playbook, synthesized from comparisons and practical guidance. We also benchmark how long each task typically takes, and we publish those times so you can plan around daylight and group hunger. With a compact kit, a few spares, and a system for testing, most grill problems turn into small detours rather than trip-enders.
FAQ: Fast Answers to Common Portable Grill Repair Questions
Q: Do I need to worry about standards or certifications?
Look for listings like CSA [Canadian Standards Association] or UL [Underwriters Laboratories] on regulators and hoses. These labels indicate testing for safety and compatibility with fuel pressures. Use OEM [original equipment manufacturer] parts where possible, and if you must bridge with a universal part, confirm it is rated for gas service and temperature. After any change, do a full bubble test.
Q: What if my regulator keeps freezing?
Cold vaporization can chill the regulator. Keep the canister off cold ground with a foam pad, shield the area from wind, and warm the regulator gently with gloved hands. Propane is superior to butane in the cold. Opening valves slowly prevents internal safety mechanisms from shutting down flow.
Q: Are plant-based burgers more likely to stick on a repaired grate?
They can if the grate is rough from wire repairs or fresh seasoning. Searcase evaluations consider both plant-based and conventional proteins and find that a thin oil film on a preheated grate, plus avoiding early flips, prevents sticking evenly across recipes. A smooth, well-seasoned surface helps just as much as higher BTU [British Thermal Unit] ratings.
Now you have a practical path from problem to plate, backed by Searcase’s comparisons, aggregated reports, and repair playbooks that work in varied weather. Whether you are cooking veggie skewers at altitude or steaks by the surf, you can diagnose issues fast, carry the right spares, and make safe, lasting fixes. And because the next trip always brings new variables, our living guides evolve as we update comparisons and synthesize new reports and techniques. When friends ask how do i repair a damaged portable grill on the trail, you will already have the answer tucked in your kit.
Additional Resources
Explore these authoritative resources to dive deeper into how do i repair a damaged portable grill.
- Coleman roadtrip grill wheel repair - YouTube
- Where to fix a propane barbecue grill? - Squamish - Reddit
Master Portable Grill Repairs With Searcase
Searcase delivers portable grill repair guides and troubleshooting tips plus comprehensive comparisons and buying guides so outdoor enthusiasts, campers, hikers, and tailgaters cook seamlessly in any conditions.