Portable Grill Prep: Leakproof Transport Kit System
By Priya Nayar • 19th Oct
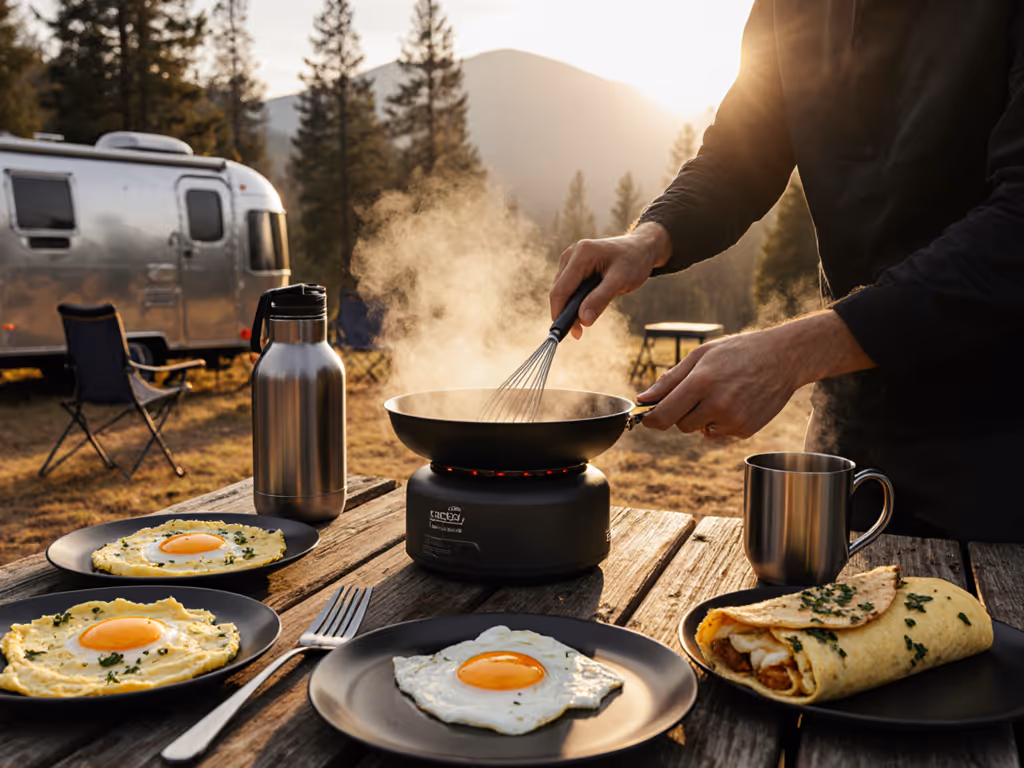
When your portable travel grill is actually portable (meaning it fits your trunk, bike pannier, or train seat with room to spare), you'll cook outdoors more often. It's not about fancy gear, it's about outdoor cooking preparation that solves your real pain points: messy leaks, fumbled setups, and the dread of arriving without a critical component. As someone who's refined modular go-kits for urban parks and coastal trailheads, I've learned through hard experience that smart packing beats buying again. Carry the fuel you can buy twice in town.
Step 1: Master Your Fuel Strategy Before You Leave Home
Fuel anxiety keeps more people from spontaneous grilling than anything else. But this isn't about which fuel is "best" (it's about which fuel is most available at your destination). That overnight train trip to the coast taught me this: my folding grill worked only because I had both butane and propane canisters with a single adapter. When station vendors ran dry of butane, I pivoted without panic.
Apply this modular kit mindset to your prep:
- Check two fuel points ahead of time: Use apps like GasBuddy or local park websites to verify what's available within 1 mile of your site
- Standardize your connectors: Choose a stove/grill needing common 1lb propane canisters (Coleman style) rather than niche adapters
- Calculate your burn time: Most 1lb propane canisters deliver 1.5 hours at medium heat (enough for 8 burger patties or 12 chicken thighs)
Your fuel strategy must align with your mobility constraints. If you're taking public transit, a single 1lb propane canister (available at nearly every U.S. gas station) creates less friction than hunting for specialty charcoal.
Step 2: Optimize Meal Components for Minimal Space, Maximum Flavor
Pre-grill meal planning isn't just about recipes (it's about space math). For a 4-person meal:
- Raw meat volume: 1.5 lbs of burger patties (about 40% of your total pack weight) needs 32oz of container space
- Marinade ratio: 1 part acidic liquid (vinegar, citrus) to 3 parts oil maximizes flavor penetration without requiring overnight time
- Cost-per-meal math: $12 for quality ground chuck grinds to $3/meal versus takeout at $15/meal
Portable marinating solutions require leakproof containers that double as transport vessels. I use a nested system:
- Primary container: Vacuum-sealed bags for meat (removes excess air, saves 30% space)
- Secondary container: Rigid food-grade vessel for drips (I repurpose the
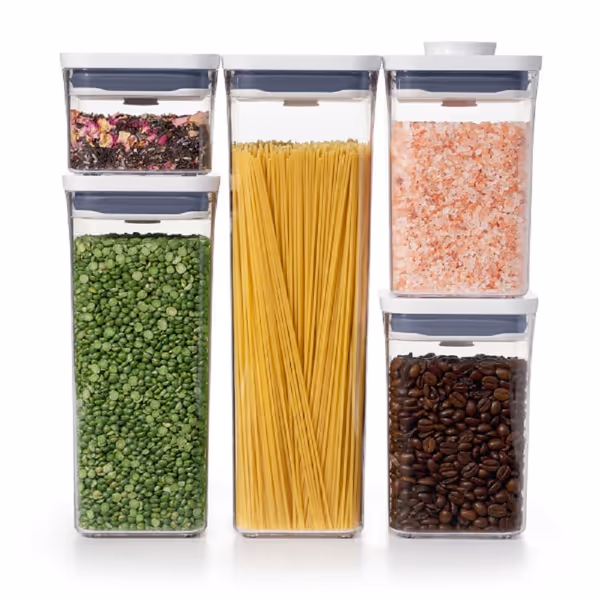
OXO Good Grips POP Container Set
Airtight, stackable containers for fresh pantry organization.
$44.48
Dishwasher SafeTop-rack
Dishwasher SafeTop-rack
Pros
Airtight seal keeps food fresh
Stackable, space-efficient design
Dishwasher safe for easy cleaning
Cons
Lid mechanisms can be inconsistent
Customers find these food storage containers to be of good quality with a nice see-through design and appropriate sizes for various items. However, the functionality receives mixed feedback, with some saying they work great while others report issues with tops not working. Moreover, the containers' sturdiness is concerning, with reports of lids breaking and falling off. Additionally, the seal is problematic, with customers noting that the lids don't seal tightly.
Customers find these food storage containers to be of good quality with a nice see-through design and appropriate sizes for various items. However, the functionality receives mixed feedback, with some saying they work great while others report issues with tops not working. Moreover, the containers' sturdiness is concerning, with reports of lids breaking and falling off. Additionally, the seal is problematic, with customers noting that the lids don't seal tightly.
)
- Tertiary container: Mesh bag for herbs and aromatics (prevents crushing)
The key is compact food storage for grilling that fits your transport mode. For backpackers, I recommend flattening burgers between parchment paper before freezing (stackable patties take half the space of domed shapes).

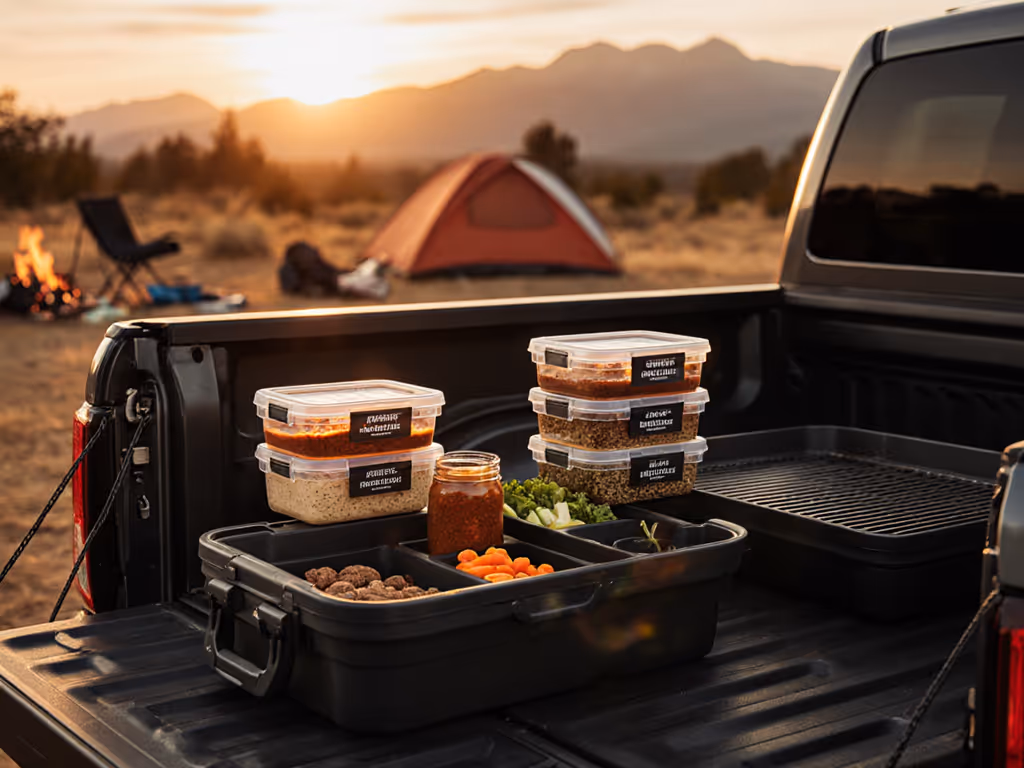
Step 3: Build Your Leakproof Transport System
Most grill kits fail at transport because they treat containers as an afterthought. Your system needs:
- Three-tier containment: Inner (food), middle (liquid shield), outer (crush protection)
- Modular stacking: Components that fit together like puzzle pieces
- Zero-rattle design: Padding that stays in place during transit
Create this system with what you own already:
- Meat compartment: Line a hard-sided container with a single folded paper towel, absorbs drips without adding weight
- Drip shield: Place a small plate or cutting board between meat and grill components
- Crush zone: Use rolled-up kitchen towels as shock absorbers around fragile items
For the ultimate pack-light ethos, I've found the Ziploc Big Bag XL creates perfect outer containment that fits beneath train seats and in bike frames. If you prefer an all-in-one carry solution, explore our guide to portable grills with carry cases for built-in protection and easier transport. Unlike single-use bags, these hold up to multiple trips (critical for reducing waste without compromising protection).
Step 4: Create Your Adaptable Setup Checklist
The difference between a 2-minute setup and a 15-minute frustration session comes down to one thing: your packing sequence. Most people store gear randomly, then waste time searching at the site.
Adopt my plain-language checklists approach:
- Pack in cooking sequence: Fuel first (bottom), then grill, then tools, then ingredients
- Color-code components: Red for ignition tools, blue for cleanup items
- Pre-assemble critical joints: Attach your windscreen to the grill before packing
This method turns setup into a muscle-memory ritual. When wind gusts hit at the trailhead (as they did during my coastal train trip), you're not fumbling for parts; you're already cooking. For windproof heat stability in the field, use our step-by-step temperature control guide.
Your Leakproof Kit in Action: A Real Cost Breakdown
| Component | One-Time Cost | Meals Before Replacement | Cost Per Meal |
|---|---|---|---|
| OXO POP containers | $44.48 | 200 meals | $0.22 |
| Reusable zip bags | $15.00 | 150 meals | $0.10 |
| 1lb propane canister | $5.00 | 1.5 meals | $3.33 |
| Total | $64.48 | - | $3.65 |
Compare this to disposable containers ($0.50/meal) plus specialty fuel ($5.00/meal) and you're saving $4.85/meal; money that pays for better ingredients. That's how you build a sustainable grab-and-go kit that lasts years.
Next Step: Build Your First Modular Kit Today
Your move: Audit your current grill transport system using the 3 criteria that matter most (space efficiency, leak prevention, and setup speed). Tomorrow, when you pack your portable travel grill, intentionally place one component that solves your biggest pain point (fuel access, drip containment, or quick assembly). Within three outings, you'll have refined your system enough to handle any destination. The best grill is the one you'll actually carry and fuel anywhere; start building yours now.