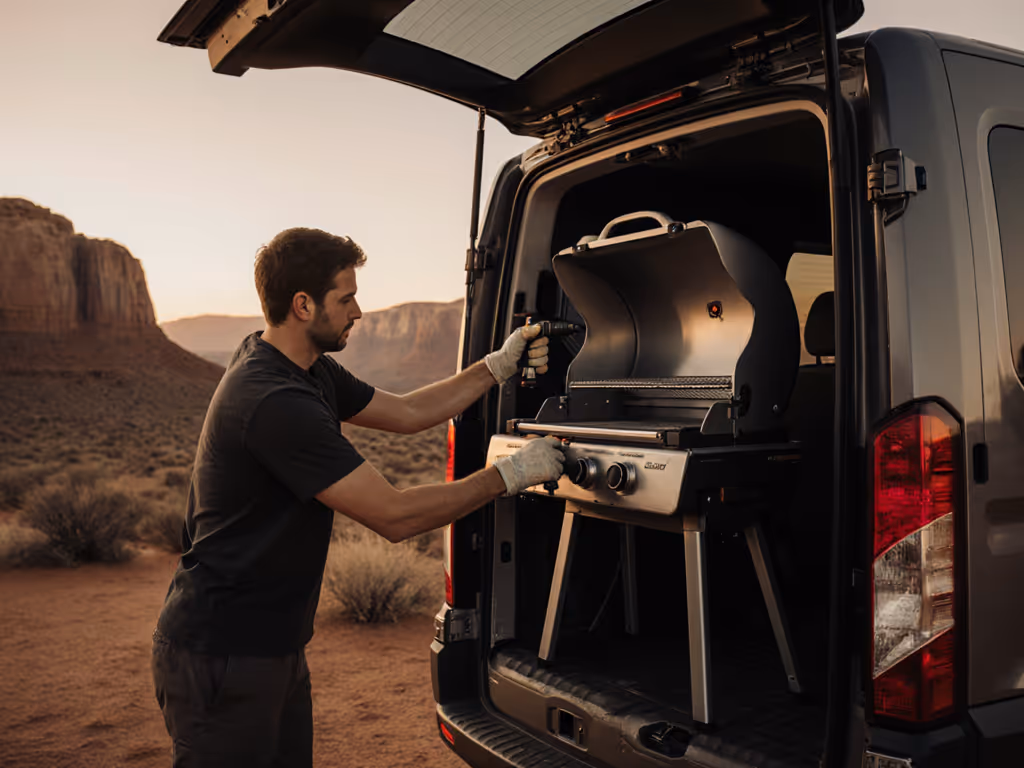
When you're converting a van into a mobile kitchen, every decision about integrated vehicle grills compounds: poor mounting choice kills workflow, unreliable ignition turns evening gatherings into fumbling disasters, and sloppy setup logistics swallow the freedom that van conversion grills are supposed to unlock. This guide walks you through the complete installation and mounting process for van conversion grills, with ruthless focus on speed, reliability, and the ergonomic patterns that separate field-tested kitchen builds from projects that frustrate you for years.
The core principle here: if it fumbles, it fails (time is your hot coal). A grill that takes eight minutes to mount and prime burns your credibility before the first burger hits the grate. I've tested setups across tailgates, beach camps, and van-life runs, and the winners all share one trait: the ignition lights first try, the grates are in reach without contortion, and the fuel source doesn't require a hunting expedition. This isn't glamour; it's muscle memory and clean layouts driving better meals and better moments.
Why Van Conversion Grills Demand Deliberate Mounting
A grill bolted into a van is not a grill mounted on a tailgate. Vibration during travel, tight spatial constraints, shared utility zones (water, electrical), and the need for quick deployment and stowage. These factors rewrite the rules. Road-tested RV grill installation prioritizes three non-negotiables:
- Vibration isolation: Movement during drive shifts can crack solder joints, loosen fasteners, and create dangerous gas leaks if connections aren't dampened.
- Quick-release coupling: The best van builds treat the grill as modular, detach it in seconds when you need the exterior space for other tasks.
- Integrated fuel supply clarity: Propane lines routed inside a living space demand pressure regulators, one-way valves, and professional pressure testing.
These constraints mean your mobile kitchen solutions don't follow typical RV stove install diagrams. You're architecting a grab-and-go system that survives highway vibration while staying legal, safe, and fast.
Step 1: Choose Your Mounting Location and Layout
Before you drill or bolt anything, walk the van's exterior and identify three candidate zones:
- Rear bumper or rear panel – gravity-fed propane risk is lower; grease doesn't spill toward living space; easy to disconnect and pack away; best for weekend van conversions.
- Passenger-side exterior wall – keeps cooking odors away from cab and windows; uses dead space; risk of soot on nearby solar panels or windows.
- Roof-mounted slide-out – premium but complex; requires reinforcement, rail systems, and careful weight distribution; suits full-time nomads.
For most conversions, the rear panel wins. For model ideas optimized for van life, see our RV portable grill picks. Measure the clearance below your backup camera or tailgate, mark the footprint with painter's tape, and test it with a cardboard mock-up to confirm door or window swing won't collide.
Step 2: Assess Structural Support and Weight Distribution
Your van frame is engineered for specific load points. A vehicle-mounted grill plus mounting hardware and fuel typically weighs 40-70 lbs. That load must distribute across the van's body panels and frame, not hang from a single spot.
Inspection checklist:
- Check your van's manual for maximum exterior load rating.
- Identify frame rails or reinforced mounting bosses behind body panels (often welded nuts are already molded in).
- Use a stud finder or tap test to locate metal backing inside the van wall.
- Never mount directly to plastic trim or fiberglass trim alone.
For rear panel mounts, aim for at least two attachment points minimum; three or four spread the load and eliminate rocking. If your van lacks factory mounting bosses, weld or rivet brackets to the frame. Do not cut and rely on adhesive.
Step 3: Plan the Propane or Fuel Line Routing
This is where van life cooking setup infrastructure meets safety regulation. If you're integrating a propane grill inside or below the van's sealed living space, you must:
- Route the fuel line externally where possible (overhead or along the exterior frame).
- Install a pressure regulator close to the tank inside the van, followed by a solenoid shutoff valve.
- Use braided stainless steel fuel line, not rubber, to resist UV and vibration cracking.
- Seal all penetrations through the van body with marine-grade silicone, moisture ingress causes rust and gas leaks.
- Label and tag every connection with the date and tester's name.
- Have a certified RV technician pressure-test the system before use.
If your grill is mounted entirely outside (recommended for simpler installs), a standard regulator and connection direct to a portable propane canister eliminate internal plumbing risk. This is the fast-track approach: no sealed living space concerns, no pressure-test paperwork, and you can detach and service the grill in under five minutes.
Step 4: Fabricate or Source the Mounting Bracket
The bracket is your foundation. It must:
- Distribute load across two or more frame mounting points.
- Isolate vibration using neoprene pads or rubber washers at each bolt hole.
- Allow quick-release coupling if the grill is temporary.
- Corrosion-resist (stainless steel or powder-coated steel; avoid bare iron).
Three mounting strategies:
- Welded permanent bracket – strongest, most vibration-proof, but irreversible. Ideal for full-time conversions. Have a certified welder add backing plates inside the van and reinforce high-stress corners.
- Bolt-on heavy-duty bracket – uses existing or pre-drilled mounting points with grade-8 bolts, lock washers, and neoprene vibration isolators. Allows removal for repairs or seasonal stowage. Takes 20-30 minutes to install or remove.
- Magnetic or quick-mount adapter – fastest deployment for external grills. Mounts to a frame rack or rail; grill attaches magnetically or via pin locks. Best for grills you may swap or transport independently.
Whatever route you choose, test the bracket under simulated vibration before final installation. A handheld orbital sander held against the mounting point while you watch for rattles reveals weakness fast.
Step 5: Install the Bracket and Isolation Pads
Time estimate: 45 minutes to 2 hours, depending on whether pre-drilled bosses exist.
- Locate exact mounting holes using a template or the grill's base. Mark with a permanent marker.
- Drill pilot holes using a bit one size smaller than your final bolt diameter. Use a drill stop to prevent puncturing the exterior skin and damaging interior finishes.
- Apply neoprene isolation pads (1/4 inch thick, 1 inch diameter) to each bolt hole. These cushion vibration and prevent metal-to-metal contact that transmits noise.
- Insert grade-8 bolts, lock washers, and neoprene washers through the bracket and into the van frame or pre-threaded bosses. Torque to the bracket manufacturer's spec (typically 15-25 ft-lbs for exterior trim; 30-40 ft-lbs for frame attachment).
- Verify no rocking by hand-pressure testing. Push down and sideways on the bracket. It should not shift.
- Seal the bolt holes on the exterior with silicone or polyurethane caulk to prevent water and debris from entering cavities.
$GENERIC_IMAGE(van rear panel mounting bracket installation)
Step 6: Secure the Grill to the Bracket
Ignition reliability and ergonomic access begin here. A grill that shifts or sags will bind burner valves and create uneven heat pockets. Mounting precision matters.
- Align the grill base with the bracket so that burners sit level. Use a small bubble level to confirm side-to-side and front-to-back angles.
- Use the grill's provided mounting hardware (usually stainless fasteners). Do not substitute or reuse corroded bolts.
- Tighten in a star pattern (opposite corners alternately) to distribute pressure evenly and prevent warping.
- Re-torque after 24 hours of sitting; metal settles and fasteners often need a second pass.
- Inspect the grill's legs if it has them. They should not touch the ground; all weight should hang from the bracket. Adjust or remove legs to prevent stress concentration.
Step 7: Connect Fuel Supply and Test for Leaks
Critical safety checkpoint (do not skip this).
External Propane Connection (Recommended for Van Conversions)
If your grill connects to a portable 1 lb or 20 lb propane tank mounted externally:
- Install a two-stage regulator if using a high-capacity tank (20+ lbs). This maintains stable pressure as the tank depletes and prevents vapor lock in hot weather.
- Use braided stainless hose (POL or Acme thread, depending on tank valve type) rated for the pressure and temperature.
- Fit a shutoff ball valve inline, positioned within arm's reach for emergency kills.
- Apply soapy water to every connection (regulator inlet, hose coupling, grill inlet valve) while the tank is open. Bubbles indicate a leak. Tighten fittings incrementally; over-tightening cracks seals.
- Allow 5 minutes of idle burner operation at full throttle to verify sustained pressure and flame stability.
Integrated Propane Line (Professional Install Only)
If fuel lines run inside the van:
- Have a certified RV technician install a dedicated propane locker (an insulated, ventilated compartment that isolates the tank from living areas).
- Run steel or braided-copper fuel line externally along the frame, never through walls or under floors where damage or corrosion can't be inspected.
- Install a solenoid shutoff valve near the grill. This remotely kills the fuel if the grill ignites unexpectedly or if you need emergency shutdown.
- Pressure-test the entire system at 5 psi and hold for 30 seconds with no pressure loss (verified with a gauge).
- Document the installation with photos and dated pressure-test records; some insurance policies and park regulations require proof.
Step 8: Verify Ignition and Control Reliability
This is where theory meets reality. At a Friday tailgate, twenty hungry teens watched me unpack. The lighter was dead, but the push-button igniter on my test pick clicked once and roared. Burners hit plates in six minutes. That moment crystallized my rule about ignition: it has to be automatic, backed by manual override, and tested before you rely on it. If you struggle with spark reliability, our ignition systems guide explains fixes and upgrades that work on portable grills.
- Test the piezo push-button igniter on each burner three times in succession. If it fails once, troubleshoot before deployment.
- Keep a long-stem grill lighter in the van (stored in a dry, accessible spot). Lighters fail; backup igniters save the day.
- Confirm valve operation by turning each knob through its full range, smooth, no grinding sounds.
- Check flame color and height at low and high settings. Blue flame = complete combustion; yellow or orange = incomplete combustion, moisture, or regulator issue. Adjust regulator or fuel line orientation.
- Run a 15-minute preheat cycle to verify no pressure drop and consistent burner output.
Step 9: Install Wind and Weather Protection
Mobile kitchen solutions that work in real conditions account for wind, cold, and moisture. For quick DIY baffles and airflow tweaks, try these 2-minute wind fixes.
- Windscreen or baffle panel: Positioned on the windward side (not blocking airflow to the grill). Reduces fuel consumption by 20-30% in 10-15 mph wind and stabilizes flame height. Attach via quick-pins or magnetic clamps so you can remove it in seconds.
- Splash guard or grease pan: A shallow tray below the cooking grate collects drippings. Disposable aluminum pans work; reusable stainless is better. Secure it so it doesn't shift during driving.
- Cover or tarp: A UV-resistant, breathable cover (not a sealed bag, which traps moisture) protects from rain and dust. Store it in a zip bag at the van so you pack it immediately after cooking.
$GENERIC_IMAGE(portable grill with windscreen and grease management setup)
Step 10: Set Up Quick-Disconnect and Stowage Protocol
A grill mounted inside or below the van is only useful if you can deploy it and pack it away without ceremonies.
From pack to plate in minutes requires a stored mental map:
- Mark the bracket's orientation on the van wall with bright tape or a sticker. If you reinstall the grill, you'll know the exact angle without trial-and-error.
- Store fuel lines and hoses coiled in a labeled dry bag (not loose, where they snag and develop kinks).
- Pre-stage the grill cover and windscreen together near the grill or in a nearby overhead bin.
- Keep ignition backup (lighter, matches) in a small sealed container zip-tied to the grill bracket or stored in a drawer clearly labeled.
- Create a checklist (laminated card or phone photo) showing:
- Fuel line connection points and thread type (POL vs. Acme)
- Igniter test sequence (all burners, three clicks each)
- Visual pre-flight: no visible cracks, burner ports clear, mounting bolts tight
- Time yourself doing a full deploy and pack-down twice. Aim for under 10 minutes total door-to-storage.
Step 11: Confirm Safety and Legal Compliance
Before your first cook, verify: For a full checklist beyond van installs, see our portable grilling safety guide.
- Fire ban status for your destination (check local fire authority websites or ranger stations).
- Park or venue policies on propane, open flame, and placement restrictions.
- Insurance coverage for the modified van, especially if you're renting or financing. Some policies exclude propane-fueled appliances installed by non-factory parties.
- Gas line certification if you have internal propane plumbing, many municipalities require inspection and tagging.
- Vehicle registration changes if your van is reclassified as a motorhome (may unlock roadside services but affects insurance and campground eligibility).
Step 12: Maintenance and Long-Term Reliability
Once installed, your RV grill installation only stays reliable with routine checks: For step-by-step cleaning routines and travel-friendly degreasing methods, see our portable grill cleaning guide.
- Monthly: Inspect bracket bolts for looseness; wiggle the grill by hand. Tighten any fasteners.
- Quarterly: Check fuel line for cracks, kinks, or corrosion. Replace if damaged.
- Before each trip: Test ignition, verify all valves turn smoothly, inspect for visible leaks using soapy water.
- Seasonally: Clean burner ports with a thin wire or toothpick if flame is uneven. Inspect mounting pads for cracking and replace if hardened.
- Annually: Have a technician perform a full propane system pressure test if integrated into the van. Replace any corroded bolts or fasteners.
Your Next Move
The difference between a grill that works and one that becomes a frustration is precision during install. You now have the roadmap: bracket choice, bolt torque specs, fuel line protocol, and the deployment checklist. Start with your van's structural assessment: locate those frame mounting bosses, confirm your van's weight limits, and choose between external quick-disconnect (fastest, lowest risk) or integrated fuel (complex, permanent, requires professional certification).
If this is your first install, recruit a friend who's comfortable with power tools and spend an afternoon dry-fitting the bracket before you drill a hole. Test the fuel connection with soapy water before you cook. Run your deploy-and-stow sequence twice to ingrain the steps. Then, the next time hunger strikes at a tailgate or campsite, you'll unpack, ignite, and have food in the hands of your crew in minutes. No fumbling, no second-guessing, no fumbles. That's when you know the system works.